Plasma Torch Initial Height Sensor - Prototype

Plasma Torch Initial Height Sensor - Prototype

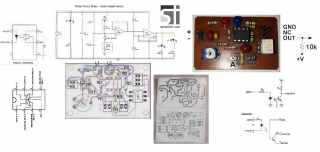
I was working in eagle to re-create the schematic which I can then design a pcb for. I have a question on the TVS-18V 23nF capacitor labeled in your schematic. Is this actually a capacitor or is it a voltage suppression diode?
https://www.electronicsurplus.com/motorola-p6ke18a-diode-tvs-18v

Transient Voltage Suppressor Diode

I found a reciept where I ordered 36V

https://www.mouser.com/ProductDetail/Vishay-Semiconductors/P6KE36CA-E3-54?qs=ACmI7jQvrjou0HXDaeB0pw%3D%3D

I think I made the schematic early on

I think I went with 36V to cover up to 24V supply on the last one I built which is still working

At some point while I was away a tree fell on my home/office and looters took all my stuff so that kinda knocked me out of playing with the electronics
 
This is available on the osh park website a PCB manufacturer. It will cost $13 to make 3 pcb's in a nice purple color.
 

Attachments

You must be signed in to view attachments...
  • ohmic v1a.zip
    56.9 KB
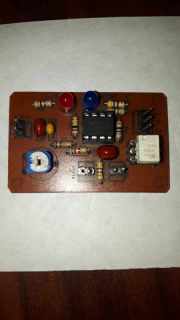
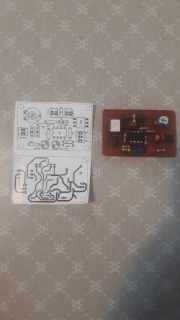
buen d├¡a a todos , he le├¡do muy detenidamente el foro y me parece excelente ,muy buenos aportes , he bajado los archivos y planos del sensor ohmico, tambi├®n he realizado la placa pcb , y en este momento necesito su ayuda , como conecto la placa a mi cnc para poder probar .....de antemano agradezco su ayuda.

good day to all, I have read the forum very carefully and it seems excellent, very good contributions, I have downloaded the files and plans of the ohmic sensor, I have also made the pcb board, and at this moment I need your help, how do I connect the board to my cnc to be able to test ..... in advance I appreciate your help.

tarjeta ohmic.jpeg
 
prob├® conectar 12 v dc a l poder y no se enciende ni led,,,,,,,,

LED1 should light on when 12v dc power is applied - there would be 12v dc across the LED and it would be on

check the voltage on the LED - if good then the LED could be bad or backwards - if voltage to LED is not good then its hard to speculate a cause without more information about voltage readings at the supply and at the LED

there is no point in connecting it to the CNC before fully testing and resolving all problems with LED activity
 
este esquema no funciona ,,ya lo hemos probado de todas formas posibles, nos ayudas SignTorch con tu esquema o plano completo para poder realizar la tarjeta pcb , o si puedes subir los planos de tu tarjeta pcb completos , .......

this scheme does not work,, we have already tried it in every possible way, can you SignTorch help us with your complete scheme or plan to be able to make the pcb card, or if you can upload the complete plans of your pcb card

bad plano.jpeg
 
este esquema no funciona ,,ya lo hemos probado de todas formas posibles, nos ayudas SignTorch con tu esquema o plano completo para poder realizar la tarjeta pcb , o si puedes subir los planos de tu tarjeta pcb completos , .......

Your circuit looks correct except as noted in following posts

You will have to troubleshoot - remove the chips - confirm 12v and L1 operation - install U1 and test voltage swing on pin 1 when probe is grounded or not - then on pin 7 - see following posts

I did not confirm your resistor values and I can't tell if you substituted any components (other than U2 as noted below) which might affect operation
2022-05-27_19-20-38.jpg
 
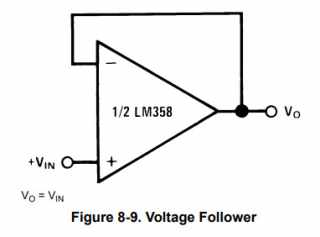
U1-1 is a voltage follower - pin 1 should be + and go - when probe is grounded
2022-05-27_19-49-06.jpg
U1-2 is a comparator biased by voltage divider R1/R2 - pin 7 goes + when V on pin 6 drops below V on pin 5
2022-05-27_19-48-51.jpg
that's to the best of my recollection - a comprehensive explanation is difficult to provide
 
R4 is not a real resistor - it represents the probe connection to ground - so terminal A is your probe connection - terminals BCD are not relevant

2022-05-27_19-20-08.jpg
 
For U2 you substituted 4N25 for H11L2M

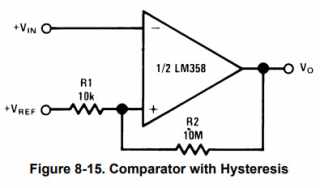
H11L2M is a digital schmidt trigger output for clean fast TTL signal transition

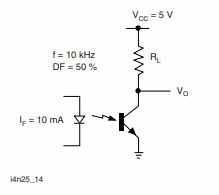
4N25 is an analog phototransistor output - it appears you have pin 6 labeled as 5V, if I'm not mistaken that is triggered internally optically and is not normally connected
2022-05-27_20-10-08.jpg
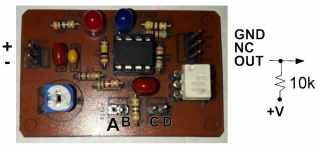
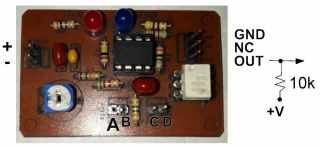
On the output pin 5 - you do need a pullup resistor - I typically use 10k ohms
2022-05-27_19-20-08.jpg
 
I did this 8 years ago - I can't easily provide my circuit drawings - I used densely packed surface mount components in all diferent sizes - my drawings do not contain exact component specs - it would be difficult to obtain exact equivalent components
 
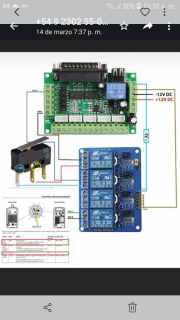
Te comento ...trabajo con este esquema de la foto para sensar la altura inicial ....y un eje z flotante ..deseamos implementar tu dise├▒o de sensor ohmico .....ademas ....si piedes ayudar en donde o en que posicion deberimos colocar tu sensor?
 

Attachments

You must be signed in to view attachments...
  • Screenshot_20220517-165740_Gallery.jpg
    47.9 KB
El pin 11 trabaja con 12v y cuando el contacto trabaja el pin11 cambia a 0v .ademas cuando se enciende el arco de plasma . El sondeo inicial se desconecta para proteger el sistema probe
 
your screenshot is too small and obscure to see pin numbers or labels to understand how and why pin 11 is routed through 2 relays and that limit switch to ground

your floating Z limit switch contacts should be routed directly from gnd to pin 11 through the normally cloased contacts so that pin 11 is always grounded during normal operation - pin 11 should also have a strong pullup resistor because input pins must never be open circuit

ideally your control should just ignore probe signals when not probing - or you could run a normally open relay in parallel from gnd to pin 11 and activate that relay during torch operation to ground pin 11 during torch operation in case the limit switch opens during torch operation - if that is a problem

my contact sensor is not available - but there would be no reason to use it and a floating Z sensor

good luck getting anything to work with a HF torch - that breakout board doesn't look like it has much noise filtering - so the whole computer could be at risk - HF can be hard to work with - I doubt my little sensor circuit would even survive HF exposure
 
Back
Top Bottom