You are using an out of date browser. It may not display this or other websites correctly.
You should upgrade or use an alternative browser.
You should upgrade or use an alternative browser.
ipkedyormom
registered
does this come in a pcm file?
SignTorch
Artist
does this come in a pcm file?
no, .PCM is a plasmacam job file, which is not a standard vector clipart format
you can import the .DXF (then when you save your project it will be .PCM)
ipkedyormom
registered
when that happens the whole things gets a little screwed up
SignTorch
Artist
when that happens the whole things gets a little screwed up
I don't know what that means
if you import and convert to cut paths before scaling it to an appropriate size then that might the problem
import, then scale, then convert to cut paths
be sure that import is not set to convert to cut paths automatically
ipkedyormom
registered
tried it you can still see the basic shape of the emblem but the inside gets kinda messed up with the circles and stuff
ipkedyormom
registered
SignTorch
Artist
let me guess - your kerf comp is about .06" and the size of that design is right at 8" square
you cannot expect to cut that detailed design 8" tall with .06 kerf - or at whatever size that is with that much kerf compensation
refer to my previous post about scaling the design (up) to an appropriate size for your machine before converting to cut paths
try scaling it up to 24" tall (before applying .06" kerf compensation)
SignTorch
Artist
what you are seeing is the cut-path which is the centerline of the cut, that's why it looks odd
the cut-path does not resemble the original clipart nor does it show what the final part will look like
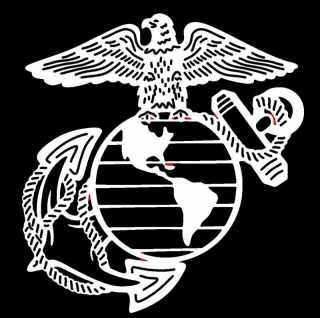
if we don't scale the clipart, it is about 8" tall
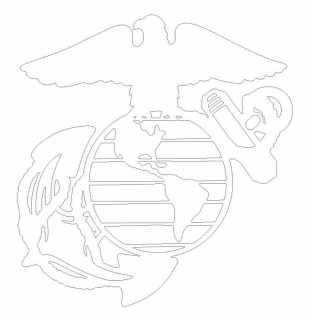
if we apply .06" kerf compensation (looks odd)
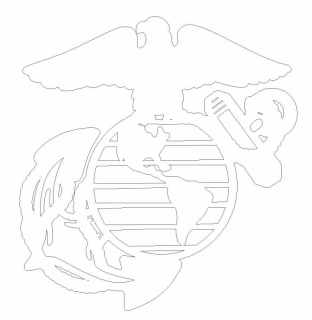
at that scale the red areas won't cut, they are too narrow for that kerf

and the .06" wide centerline cuts appear too wide relative to the overall design at that size
if we scale 200% to 16" tall then there are fewer and smaller red areas that are still too narrow to cut
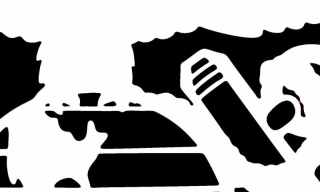
and the width of the centerline cuts is more appealing

so, it will cut ok at 16" tall with .06" kerf, but it'd have to be a little larger than that for .06" kerf to cut every last detail
you could edit those narrow spots to make them wider for a perfect cut at 16" tall
cutting at 8" tall with .06" kerf would not come out too good at all
even a vinyl cutter with zero kerf would struggle to cut that design much smaller than 8" tall because that amount of detail just can't easily be crammed into that small of a space (when cutting through most material that comes in a sheet) - that's not to say it can't be cut smaller (an engraver could make it less than 1" tall)
the benefit of using vector clipart is that it is infinitely scalable - so you can scale it to any size you need for any machine and any material - but the tool size and material does limit how small any given design can be cut succesfully
the cut-path does not resemble the original clipart nor does it show what the final part will look like
if we don't scale the clipart, it is about 8" tall

if we apply .06" kerf compensation (looks odd)

at that scale the red areas won't cut, they are too narrow for that kerf

and the .06" wide centerline cuts appear too wide relative to the overall design at that size

if we scale 200% to 16" tall then there are fewer and smaller red areas that are still too narrow to cut

and the width of the centerline cuts is more appealing

so, it will cut ok at 16" tall with .06" kerf, but it'd have to be a little larger than that for .06" kerf to cut every last detail
you could edit those narrow spots to make them wider for a perfect cut at 16" tall
cutting at 8" tall with .06" kerf would not come out too good at all
even a vinyl cutter with zero kerf would struggle to cut that design much smaller than 8" tall because that amount of detail just can't easily be crammed into that small of a space (when cutting through most material that comes in a sheet) - that's not to say it can't be cut smaller (an engraver could make it less than 1" tall)
the benefit of using vector clipart is that it is infinitely scalable - so you can scale it to any size you need for any machine and any material - but the tool size and material does limit how small any given design can be cut succesfully
Is there a way to "reverse" the cutout to use it on a fire pit ring? I have 0-little experience as we are just starting up with a CNC Plasma Cam using PlasmaCam Design Edge which I have found very limiting. I do not know any other programs yet. Would it be possible to provide the same image but so that it would, for lack of better words, remain without the whole picture falling out. As the template is for a cutout and I need more of a stencil. Not sure I'm explaining very well, so let me know if you have more questions. The project I am working on is a fire pit for my friends son who has enlisted in the Marines.
SignTorch
Artist
if we reverse this design then all the interior detail linework will fall out
what you want to do is make a hole that the design fits in - and create some overlap betwen the design and the hole
one way is to select the design perimeter and offset it to the outside a small amount - that forms the hole (red part)
then add bridges (green) to hold the design (blue) in place

what you want to do is make a hole that the design fits in - and create some overlap betwen the design and the hole
one way is to select the design perimeter and offset it to the outside a small amount - that forms the hole (red part)
then add bridges (green) to hold the design (blue) in place


